Archive for Garden

Create a habitat for Monarch Butterflies with milkweed


Help Create Habitat for Monarch Butterflies

One of the many wonderful things we get to experience in this beautiful mountain town is all the wild life. I love spring time and seeing the beautiful butterflies touch down in my garden is magical. While butterfly bushes do attract these majestic creatures, it is actually milk weed where Monarch butterflies call home, mate and lay their eggs.

Planting milkweed will support the monarch populations, and their incredible migrationMonarchs cannot survive without milkweed. Monarch butterflies need milkweed to lay their eggs and the caterpillars of these butterflies only eat milkweed plants. We have lost much milkweed from the natural landscape with shifting land management practices. Planting milkweed is a great way to help other pollinators too because milkweed provides valuable nectar to many types of bees and butterflies.

Adult monarchs will drink the nectar of milkweed and many other flowers. In fact, they need sources of nectar to nourish them throughout the entire growing season. Include a variety of native flowering species with different bloom times to provide monarchs with the food they need to reproduce in the spring and summer and to migrate in the fall. Offering a wide array of native nectar plants will attract monarchs and many other butterflies and pollinators to your habitat all season long.

Key Habitat Considerations

  • Native milkweeds provide food for monarch caterpillars.
  • Native flowers provide food for adult butterflies. A combination of early, middle and late blooming species, with overlap in flowering times, will fuel butterfly breeding and migration and provide beautiful blooms season-long.
  • Insecticides should never be used in or surrounding pollinator habitat. Limit use of herbicides within and surrounding the habitat only to control invasive or noxious weeds.
  • Habitats can be created in any open space protected from untimely mowing or pesticide application.

You can check with local native plant nurseries or greenhouses for their recommendations of good pollinator plants for your area.

Milkweeds can be propagated from seeds, cuttings, and, in some cases, from root divisions. Milkweed seeds can be planted in prepared beds outdoors or started indoors in flats. We recommend the latter approach since germination rates are usually higher indoors and it is easier to establish your milkweeds with transplanted seedlings that are well-rooted and therefore more resistant to weather extremes and pests.

Harvest and Storage of Milkweed Seeds

If you have some milkweed and would like more for next year to promote butterfly a habitat in your garden; the timing of the collection of milkweed pods or seeds is critical. Mature pods are those that are within a day or two of opening. If you squeeze the pods and they don’t open easily, they usually do not contain mature brown seeds. Seeds well into the process of browning and hardening will germinate when planted the next season. Pale or white seeds should be not collected.

Preparation for planting

To stratify seeds, place them in cold, moist potting soil (sterilized soil is best but is not required) in a dark place for several weeks or months. Since most people prefer not to place potting soil in their refrigerators, an alternative is to place the seeds between moist paper towels in a plastic bag. This procedure works well, in part because there are fewer fungi and bacteria available to attack the seeds. After a stratification period of 3-6 weeks, the seeds can be planted in warm (70˚F), moist soil. Without stratification, the percentage of seeds that germinate is usually low.

Germinating, Growing and Transplanting
Milkweed seedlings can be started indoors in a greenhouse or under artificial lighting and then transplanted outdoors after the average date of last frost. If seeds are started indoors, allow 4-8 weeks growing time before transplanting. Plastic flats can be used to start the seeds. Fill the flats with a soil mix thoroughly soak the soil, and let the excess water drain. Sow the seeds by scattering them on the soil surface 1/4-1/2 inch apart, and then cover with about 1/4 inch of additional soil mix. Gently mist the soil surface with water to dampen the additional soil mix that has been added. To improve germination rates, you can place the seeds in packets made from paper towels and soak them in warm water for 24 hours prior to planting. This method seems to work especially well for seeds of species that require stratification.

After the seeds are sown in the flats, cover each flat with a clear plastic cover or a plastic bag to keep the seeds from drying out while germinating. Then, place the flat under grow lights, in a warm sunny window, or in a greenhouse. Most seeds will germinate in 7-10 days if the flats are maintained at 75˚F. After the seeds have germinated, remove the plastic covering from the flats. Once the seedlings have emerged, the soil should be kept moist by watering the flat from the bottom. You can water from the bottom by placing the flat in a sink or a larger flat filled with 2 inches of water until moisture appears on the soil surface. The soil should be kept moist but some care is needed to keep the seedlings from getting too wet to prevent any fungal growth.

The plants are ready to be transplanted when they are about 3-6 inches in height. Before transplanting, acclimate the plants to outdoor conditions for a few days by placing them in a sheltered location during the day and then bringing them indoors at night. The seedlings should be planted 6-24 inches apart depending on the species (check the back of your seed packets for information). Newly transplanted plants should be watered frequently. Add mulch around the seedlings soon after planting. The mulch holds in the moisture and minimizes the growth of competing weeds. The seedlings should be fertilized 2-3 times during the growing season if using water-soluble fertilizer or once a season if you utilize a granulated time-release formulation.

When to Plant
Milkweed seeds can be sown outdoors after the danger of frost has passed. Plant the seeds early since those planted late in the season may not germinate because of high temperatures. Keep in mind that seeds have a range of soil temperatures at which they will germinate. Remember sunny conditions can cause the soil temperatures can be much higher in daytime. Germination outdoors depends on soil moisture and temperature and could take several weeks if conditions are not ideal.

Posted in: Animals, Around the District, Community, Customer Infomation, Garden, Monarch Butterflies

Leave a Comment (0) →

Self Watering Raised Bed Gardens

In an effort to reduce water usage out of doors, but still be able to garden, one option is a self watering container.  They are an excellent choice because the water is contained under the plant and therefore does not evaporate and is available to the plant 24/7, which makes over or under watering impossible.  As long as the water reserve has water in it, the plant takes what it needs when it needs us and pretty much cuts the human out of the equation all together.  Which brings me to my next point.  Self watering containers free up your time.  Instead of being a slave to watering the garden, you just make sure the containers are kept full and that is all you have to do.  While you can use a drip or soaker system on a timer, these methods take more effort to install and the squirrels love to reek havoc on drip system parts.  Luckily, they cannot do much damage to a self watering container.

So if these self watering containers are so fabulous, why isn’t everyone using them?  Well, price is a big obstacle.  They are fairly expense when compared to other types of containers of a similar size.  Plus, what if you want to make a raised bed veggie garden for instance?  The amount of containers you would have to buy would be extensive.  So what is the solution?

A self watering raised be garden of course.  I found this video over at mylittlehomestead.com, where they show how they made a self watering raised bed garden using a 55 gallon drum cut in half.  Genius!  Why didn’t I think of that?  Here is the video.
 

I think this is a fabulous way to have your cake and eat it too. All the benefits of a raised bed garden combined with the benefits of a self watering container. What could be better? If you try this in your garden, let us know! Send us pictures or video and we will post it here on the blog. Also if you discover how to make any improvements to this design, let us know. I will be trying this in my own garden. I think it would be great.

Posted in: Edible Landscaping, From the Office, Garden, gardening, Raised Bed Gardens, Re-purposing, Recycling, The Garden, Water Conservation

Leave a Comment (0) →

Moisture on the Way

Well, believe it or not, they are predicting that we could possibly get 2 to 4 inches of snow tomorrow!  I couldn’t believe my eyes when I saw the forecast, but there it was.   A snowflake graphic was posted on Tuesday’s forecast.  Naturally, I just planted my tomatoes yesterday and I cannot bring them into the house now, so I will be outside tonight covering everything with plastic or buckets.  Such is the life of a gardener.

See the forecast for yourself.  Luckily we will be back up to warm temps by the end of the week and hopefully then our tomatoes will be safe!  If it stays warm enough, we will just get rain instead of snow.  Cross you fingers!

tomatoes

Detailed Forecast

  • Today Mostly sunny, with a high near 60. West wind 10 to 15 mph, with gusts as high as 20 mph.
  • Tonight A chance of rain showers, mainly after 11pm. Mostly cloudy, with a low around 36. West wind 5 to 10 mph, with gusts as high as 20 mph. Chance of precipitation is 30%.
  • Tuesday Snow showers likely, mainly before 11am. Mostly cloudy, with a high near 42. Breezy, with a west wind 10 to 15 mph increasing to 20 to 25 mph in the afternoon. Winds could gust as high as 35 mph. Chance of precipitation is 70%. New snow accumulation of 2 to 4 inches possible.
  • Tuesday Night A chance of rain and snow showers before 11pm, then a chance of snow showers. The rain and snow could be heavy at times. Mostly cloudy, with a low around 34. Breezy, with a west wind 20 to 25 mph decreasing to 10 to 15 mph in the evening. Winds could gust as high as 35 mph. Chance of precipitation is 40%. Little or no snow accumulation expected.
  • Wednesday Partly sunny, with a high near 49. West wind 5 to 15 mph, with gusts as high as 20 mph.
  • Wednesday Night Mostly cloudy, with a low around 40.
  • Thursday Sunny, with a high near 56.
  • Thursday Night Mostly clear, with a low around 46.
  • Friday Sunny, with a high near 64.
  • Friday Night Mostly clear, with a low around 51.
  • Saturday Sunny, with a high near 70.
  • Saturday Night Mostly clear, with a low around 52.
  • Sunday Sunny, with a high near 70.

inclement-weather-md

Posted in: Around the District, Garden, Snow, Weather

Leave a Comment (0) →

Frugal Friday

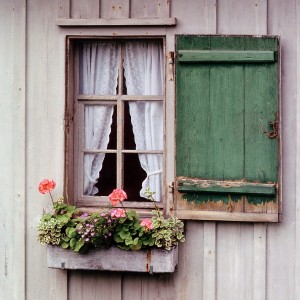
Time for another Frugal Friday tip.  I have talked a lot about raised bed and container gardens.  But there is one other way to grow a few veggies or some flowers.  Window boxes.  Window boxes are a great way to grow cherry tomatoes, lettuces and other small or mini varieties of vegetables. They are also perfect for flowers and ivy and add a charm to your home that not much else can.   They are  also excellent for making an herb garden.  What could be better than the smell of mint or basil or rosemary wafting through your kitchen window from a window box full of herbs.  Plus your cooking will improve as you will be able to just walk outside and snip fresh herbs to add to your dishes.

Window boxes are very easy to make and you can use scrap wood you have laying around or can find cheaply.  Old fence boards, plywood and other things like dresser drawers, can all be used to make window boxes.  They can be as plain or as fancy as you like.  Add trim or appliques for a shabby chic look or leave them plain for a more rustic approach.  You can even buy them pre-made and just hang them.  There are as many styles as there are budgets. Let your imagination run wild and just remember to design them so that they will co-ordinate with your home’s décor.   Here are a few examples:

Shabby Chic window boxThis example is from the blog My Shabby Streamside Studio and was made from scrap wood.  An applique was added and then the whole thing was painted shabby chic white.  Plastic window boxes tucked down inside the wooden box,  hold a variety of plants and can be changed out from season to season.

Rustic window boxHere is an example of a rustic wooden window box that was hung on brackets.

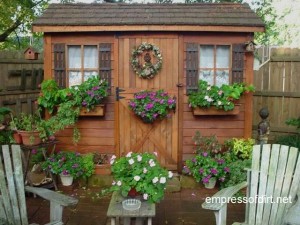
Window Box CottagesAdorable cottage style window boxes on a shed give it charm.

dresser-drawer-window-boxesHow’s this for creativity?  Old dresser drawers make perfect window boxes!

I am sure if you do a quick search online, you can come up with many more ideas, especially on sites like Pinterest.  So why not go out and rummage around  in your garage or at the local thrift store and see what scrap wood you can come up with to   create some lovely and useful window boxes for your cabin, cottage or castle and then get planting!

Posted in: Customer Infomation, From the Office, Garden, Homesteading, Raised Bed Gardens, Re-purposing, Recycling

Leave a Comment (0) →

Frugal Friday

The cleverness and imagination of some people never ceases to amaze me.  I just love when someone finds a new use for an item that would otherwise end up in a landfill.  Take automobile or truck tires for instance.  We all have the odd friend, neighbor or relative that plunks an old tractor tire in their yard and plants flowers in it.  Some even go so far as to paint the tire first, and while there is nothing wrong with this as a tire is essentially a raised be garden,  you have to admit that they just aren’t that attractive.  To me, if I am going to upcycle something into my garden, it has to not only have a useful purpose, but it has to look good and add to the overall aesthetic of my garden.  After all, the whole point of upcycling is to give a new purpose and life to old items and create a unique and useful garden space.  Making your garden look like the neighborhood dump isn’t part of the plan!

With that in mind I set out in search of new uses for old tires.  I chose tires because they are easily available and most everyone has them or can get their hands on them and usually for free or very cheaply.  Plus unlike wooden items, they last for a very long time, so you don’t have to keep redoing them as they rot out.

One word of caution.  The jury is still out on whether or not it is safe to use old tires to grow edibles.  Here is an article about it and then you can do your own research and decide for yourself if you want to use them to grow edible crops or not.   However,   there are plenty of other things you can do with them and you can always plant other types of plants in them, such as annuals,  should you decide to use them for planters.

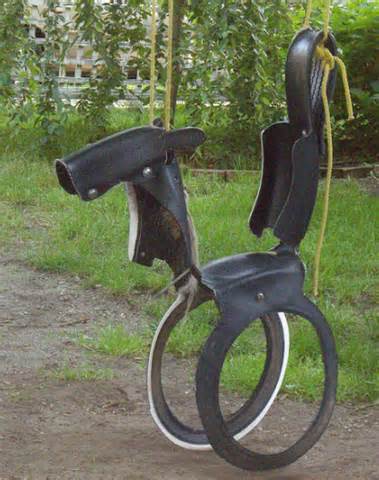
I thought these were adorable, although I am not sure if you can actually sit on them since the sign says “Please do not sit”.  But with a little imagination you could make them so that you can sit on them and I think they would be great for kids.

Tire Seats

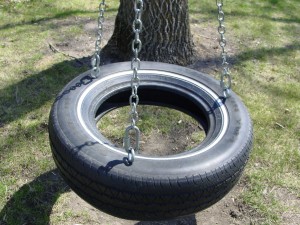
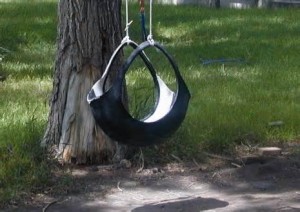
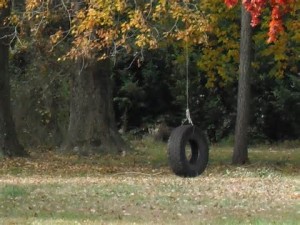
Of course, there is always the traditional tire swing.

tire swing 3

tire swing 4

tire swing 2

tire swing 1

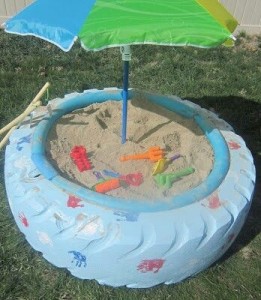
How about a sandbox?

Tire Sand Box

A vinyl shower curtain or table cloth would be the perfect cover for this when it is not in use.

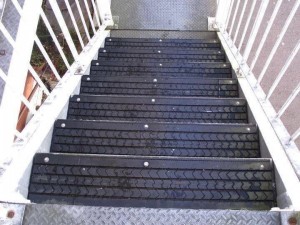
This is very clever.  Stair treads made from old tires.

Tire stair treds

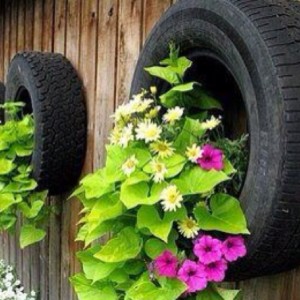
And of course, you can always make a hanging planter.

Tire Planters

Hopefully, this will give you some ideas to get your own creative juices flowing!  There are many more ideas and a quick Google search will yield lots more than I can put into a post.  If you do decide to use tires for growing edibles, there are some great tutorials on line for growing potatoes in tires, making raised bed gardens, planters and retaining walls.  The sky seems to be the limit with what you can do with old tires!  If you decide to give them a try, drop us an email and a picture of your project.  Send it to Vicki at pcwd . org.  Have fun!

Posted in: Frugal Friday, Garden, Raised Bed Gardens, Re-purposing, Recycling, The Garden, Upcycling

Leave a Comment (0) →

Sunny Days Ahead

Looks like nothing but sunny days for the next week.  While I wish I could say rain or snow is coming, it just isn’t so.   Now is a good time to get out into your garden and add some compost and mulch to help your soil absorb and retain more water.  That way your outdoor watering will become more efficient and you will use less water.

Summer Sun

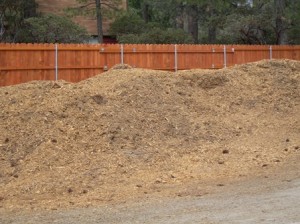
We are offering FREE compost and mulch to all Pine Cove Water District customers in order to help them conserve water outside in their gardens.  Yes, you heard right.  FREE!!! You can help yourself as the piles of compost and mulch are located behind the water district garage/workshop right here on Marion Ridge Road.  If you need an exceptionally large amount, such as a dump truck full, please stop by the office or give us a call during regular business hours.  Our phone number is 951-659-2675 and we are open Monday thru Friday from 9 am until 4 pm.  We want to be sure there is enough for everyone, so please be considerate if you plan to take a large amount so that we can make arrangements for that.   Otherwise, just help yourself.

According to Gardening for Dummies, putting down a layer of  mulch in your garden will usually provide the following benefits:

  • Inhibits weed germination and growth. (Weeds are not only unsightly, but they also steal resources from desirable garden plants!)
  • Holds in soil moisture, protecting your plants from drying out quickly
  • Moderates soil-temperature fluctuations (This benefit is especially valuable during that turbulent-weather period in spring when you don’t want your plants to be stressed.)
  • In cold-winter areas, protects plant roots from winter cold and helps prevent frost-heaving, in which plants are literally pushed out of the ground by the natural expansion and contraction of the soil as it cools off and heats up
  • In hot-summer areas, helps keep plant roots cooler
  • Depending on what you use, adds a bit of welcome nutrition to your garden as it breaks down

So come on down and get yours today and make your plants and trees happy and save water in the process.  We also have bluebird houses available to all Pine Cove Water District customers as well.  Pick yours up today.

Wood Chips

Posted in: Compost, Conservation, Customer Infomation, From the Office, Garden, gardening, Mulch, Rain, Water Conservation, Wood chips

Leave a Comment (0) →

Rain Barrels

If you missed out on our rain barrel purchase program last year, fear not.

Special Offer from PCWD

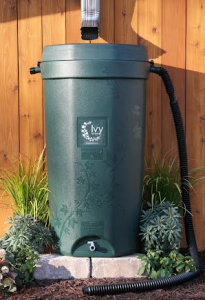
Rain Barrel from last year’s promotion.

I now have instructions that show you how to make your own rain barrel, here at the district office that you can pick up free of charge.  Or you can go to this address and look it up for yourself if you’d rather.

http://www.shelterness.com/great-diy-rain-barrel-for-those-who-want-to-go-green/

Rain water harvesting is an excellent way to collect water for outside use.  If you are interested in learning more about harvesting rain water, I recommend going to Brad Lancaster’s website at http://www.harvestingrainwater.com/.  He is one of the leading experts in rain water harvesting and saving and reducing water usage.  I highly recommend his books, videos and website as they are a wealth of information.  He also shares a lot of information on how to make your property act like a sponge and retain the rain that does fall on it.  He has many tips and tricks that we can all implement in our own gardens in order to take better advantage of any moisture that we do receive, such as creating berms and swales.

You can also amend the soil in your garden so that it is more absorbent and retains more water.  We have free compost available for Pine Cove water customers as well as wood chips that you can apply to help retain moisture and will gradually decompose over time and add even more nutrients to the soil.

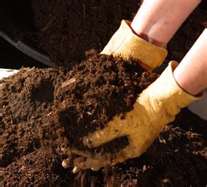
Compost

Wood Chips

Posted in: Around the District, Compost, Customer Infomation, From the Office, Garden, Rain, Rain Barrels, Rain Water Harvesting, The Garden, Water Conservation, Wood chips

Leave a Comment (0) →

Raised Bed & Container Gardens

Gardening is a very popular and rewarding past time and is alive and well here on the hill.  We have a local garden club and I personally know many people who just love to garden.  So, as promised, here is a post about raised bed and container gardening.

Gardening here in Pine Cove can be very challenging.  We face a variety of obstacles which included unpredictable weather, plant munching critters such as deer, squirrels and gophers, less than perfect soil and drought conditions.  So what is an avid gardener to do?

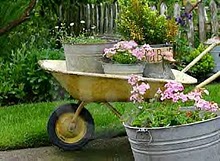
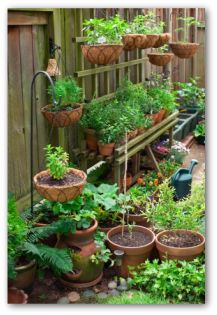
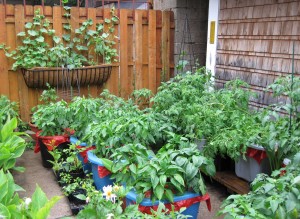
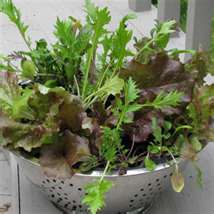
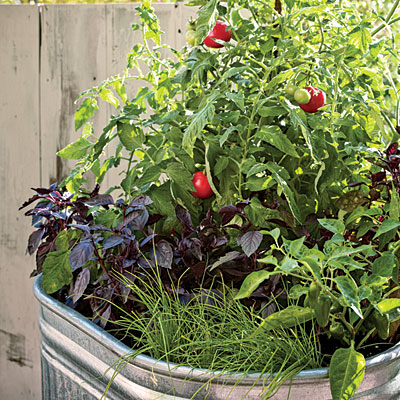
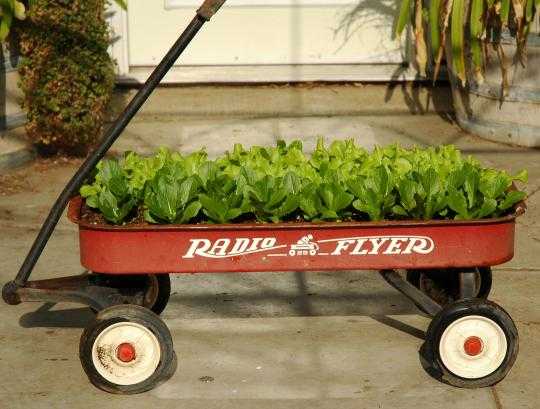
Build a raised bed or container garden of course!  I have found this to be the perfect solution to all of the above dilemmas.  Containers come in a large variety of styles, materials, colors and sizes to fit any style of home or garden.  Many plants, including vegetables and fruits, can be grown in containers.  You can also get very creative and create a container garden out of some unusual objects such as metal animal water troughs, old buckets, dressers, wagons, wheelbarrows, wash tubs, old sinks, rain spouting, baskets and many other things.  You can let your imagination run wild!  Here are some pictures to get your creative juices flowing.

Check out my next post for more on raised bed gardening!

Garden wheelbarrow

Container Garden

Vegetable-Container-Gardening-300x219

lettuce

Water trough container garden

wagon planter

Posted in: Customer Infomation, Edible Landscaping, From the Office, Garden, Uncategorized

Leave a Comment (0) →

Saving Water in the Garden

With the drought continuing to strengthen it’s grip on California, gardeners are wondering how they will be able to maintain their gardens in the coming years.  Here in Pine Cove, we are a step ahead because we do not typically have large lawns to worry about maintaining.  But even so, many residents do like to garden and even grow some of their own food.  Now is the time to start thinking about spring projects and what you can do to conserve water in the garden.

If you have an existing garden, there are several things you can do to reduce the amount of water you use in the garden.   First, be sure to add compost to your existing garden.  Soil that is high in organic matter stays moist longer. Improve your soil by adding a source of organic material such as compost or well rotted manure.  If you consistently work to improve your soil each season, the texture and water holding capacity of your soil will increase and your garden will require less water.  In order to make this easier for you, we have wonderful compost available to our customers for free!

Compost

Once you have amended your soil, it is time to add some mulch.  Why you ask?  Well, mulch accomplishes three things.  First, it adds a source of organic material which, although it is not rotted and therefor not readily available to the plants, will eventually improve the structure and the water holding ability of the soil. Second, it slows surface evaporation so you will water less and third,  it helps to smother weeds, making your gardening easier!  As it happens, we also have mulch available to our customers for free as well!

Wood Chips

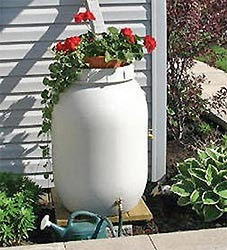
Another wonderful thing you can do to help keep your garden looking good throughout the summer is to harvest rainwater.  This can be as simple as a rain barrel under your down spout or shallow trenches to divert the rainwater to the garden.  You can add swales and berms strategically placed throughout your garden in order to keep rainwater from running off your property.  You can even go so far as to install a large water storage tank either above ground or underground in order to store thousands of gallons of rain water.  For more rainwater harvesting information, go to Brad Lancaster’s website at http://www.harvestingrainwater.com.  He has lots of information and tips on rainwater harvesting.

Rain water is FREE water.  That’s right.  Just catch it, store it and use it.  If you do a search for rain water harvesting online, you will find a treasure trove of information and lots of examples on how to set up rain harvesting system.  By using your roof water you will reap water benefits from even a gentle rain by capturing all of the water that falls onto your roof surface.

rainwater_big

Finally, install a drip irrigation system which will deliver water directly to the plants root zone instead of watering the entire surface of the garden.  Although a drip irrigation system can be expensive initially it will certainly pay off in drastically reduced water use if you intend to grow a  garden year after year. The hoses, emitters, fittings and valves must be laid out to deliver the water to each plant.  If you can’t afford to install a drip system,  an easy alternative is to use soaker hoses that allow water to seep through the porous material along their entire length.  They are less expensive to install and you can put them under the mulch to prevent evaporation.   Both methods are better alternatives than sprinklers or letting the hose run.

Remember, we are all in this drought together and each of us plays a very important part in conserving our water.

Next week, I will discuss the virtue of raised bed gardens and container gardening.

Posted in: Compost, Conservation, Customer Infomation, From the Office, Garden, Mulch, Rain Barrels, Rain Water Harvesting, Water Conservation

Leave a Comment (0) →

Water Saving Kits

With this winter’s lack of moisture, comes the reality of having to conserve water.  While this should be an ongoing way of life, here on the hill, the weather we are having, or the lack of it, seems to effect how much we think about water conservation.

In an effort to boost your conservation efforts, we are providing a few items to our Pine Cove Water District customers, FREE OF CHARGE!  That’s right.  Stuff for free.

For your outside areas, we have compost you can add to your soil to improve it.  We also have wood chips that you can put on your garden to help retain moisture.  The wood chips will eventually decompose and turn into compost as well, there by improving your soil as well.

We also have water saving kits by Niagara Conservation available free of charge to any Pine Cove Water customer.  These are great kits and include the following items:

1 Earth Massage 1.5 GPM showerhead with a two setting massage spray showerhead.

1 Kitchen Swivel 1.5 GPM Aerator with dual spray functionality, with wide spray radius and water pausing on/off valve.

2 Bathroom Faucet 1.0 GPM Aerators that deliver half the flow, but twice the power.  These are commercial grade aerators for the home.

1 Toilet Water Saver (Fill Cycle Diverter)- This patented water saver takes excess water from the bowl and diverts it to  the tank to reduce water consumption.  (This is NOT a flow restricting device.)

Toilet Leak Detection Tablets that are FDA certified, non-toxic dye tablets used to detect leaks in toilets.

Water Conservation Wheel that provides useful ways to conserve water around the house.

Flow Meter Bag.  The kit bag doubles as a flow meter to identify water wasters throughout the home.

This is a pretty good deal considering it is free of charge.  So stop by the office any time during normal business hours and pick up your water saving kit.

We also have our famous blue bird houses back in stock.  While they don’t help you save any water, they do provide shelter to our little bird friends here on the hill.

Our office is located at 24917 Marion Ridge Road and we are open Monday thru Friday from 9 a.m. until 4 p.m. So stop by today and get your free stuff!


Posted in: Compost, Conservation, Freebies, From the Office, Garden, Mulch, Water Conservation, Wood chips

Leave a Comment (0) →
Page 4 of 5 12345